
Hamsa Frame
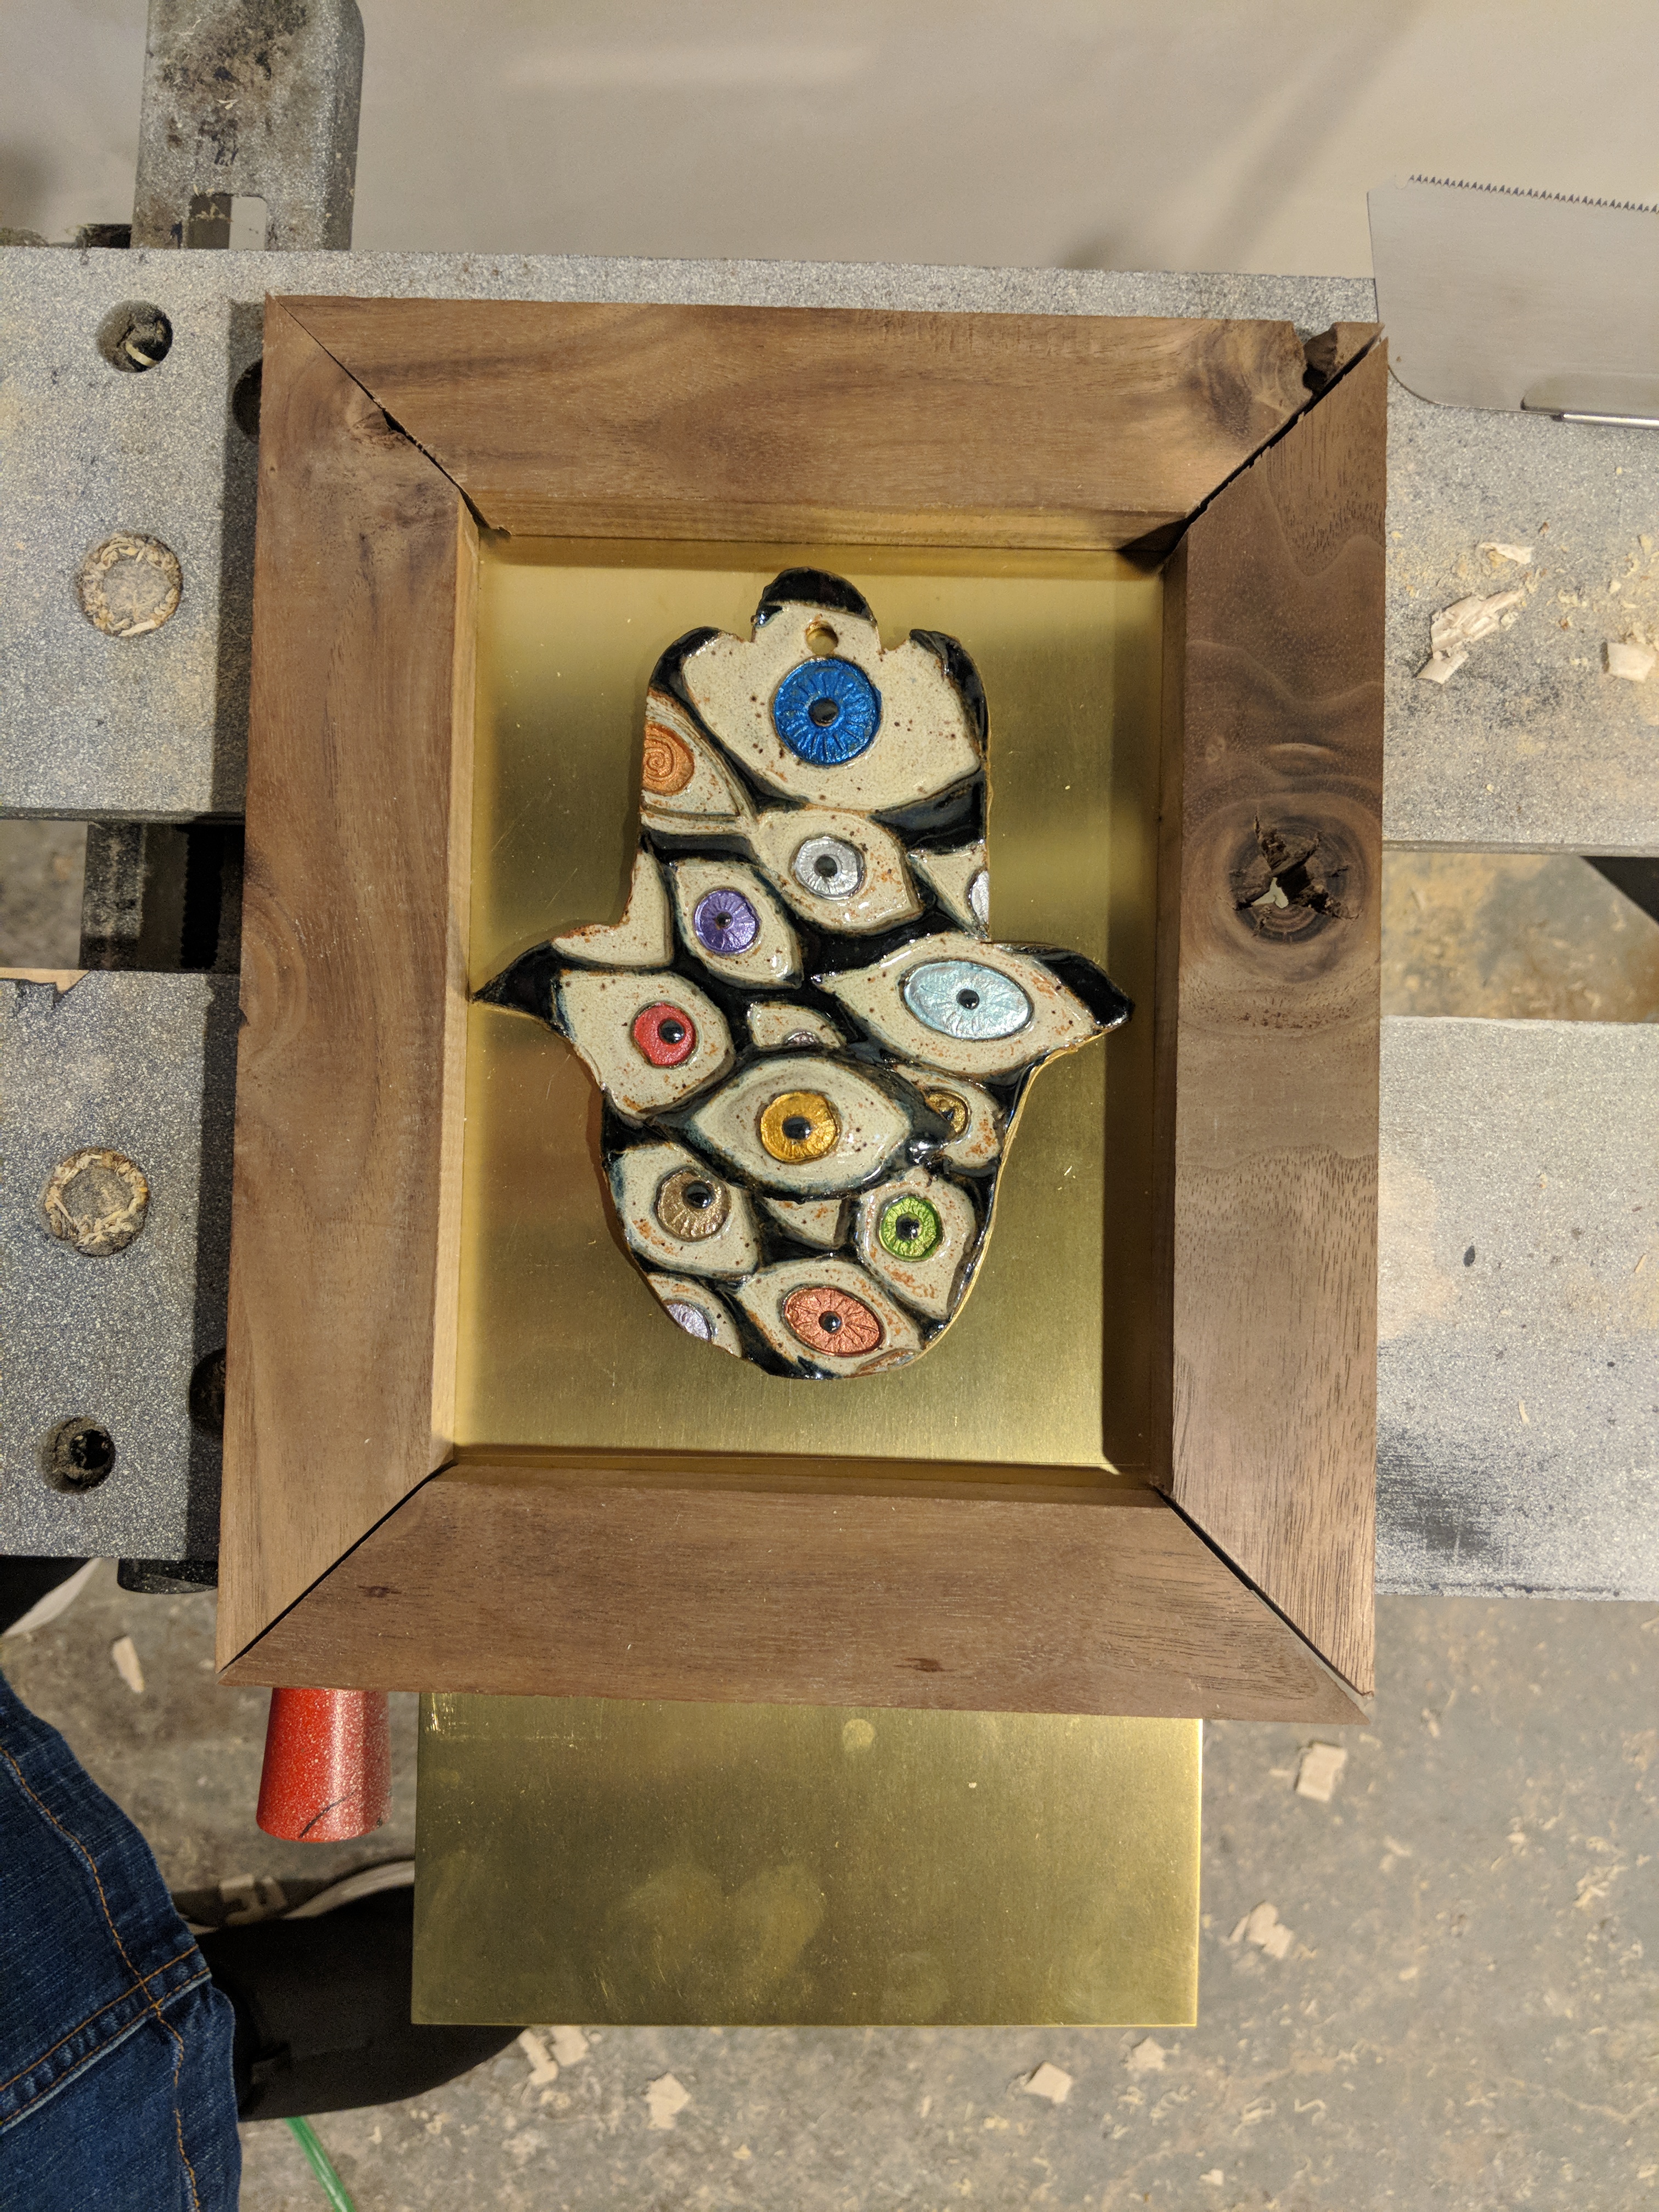
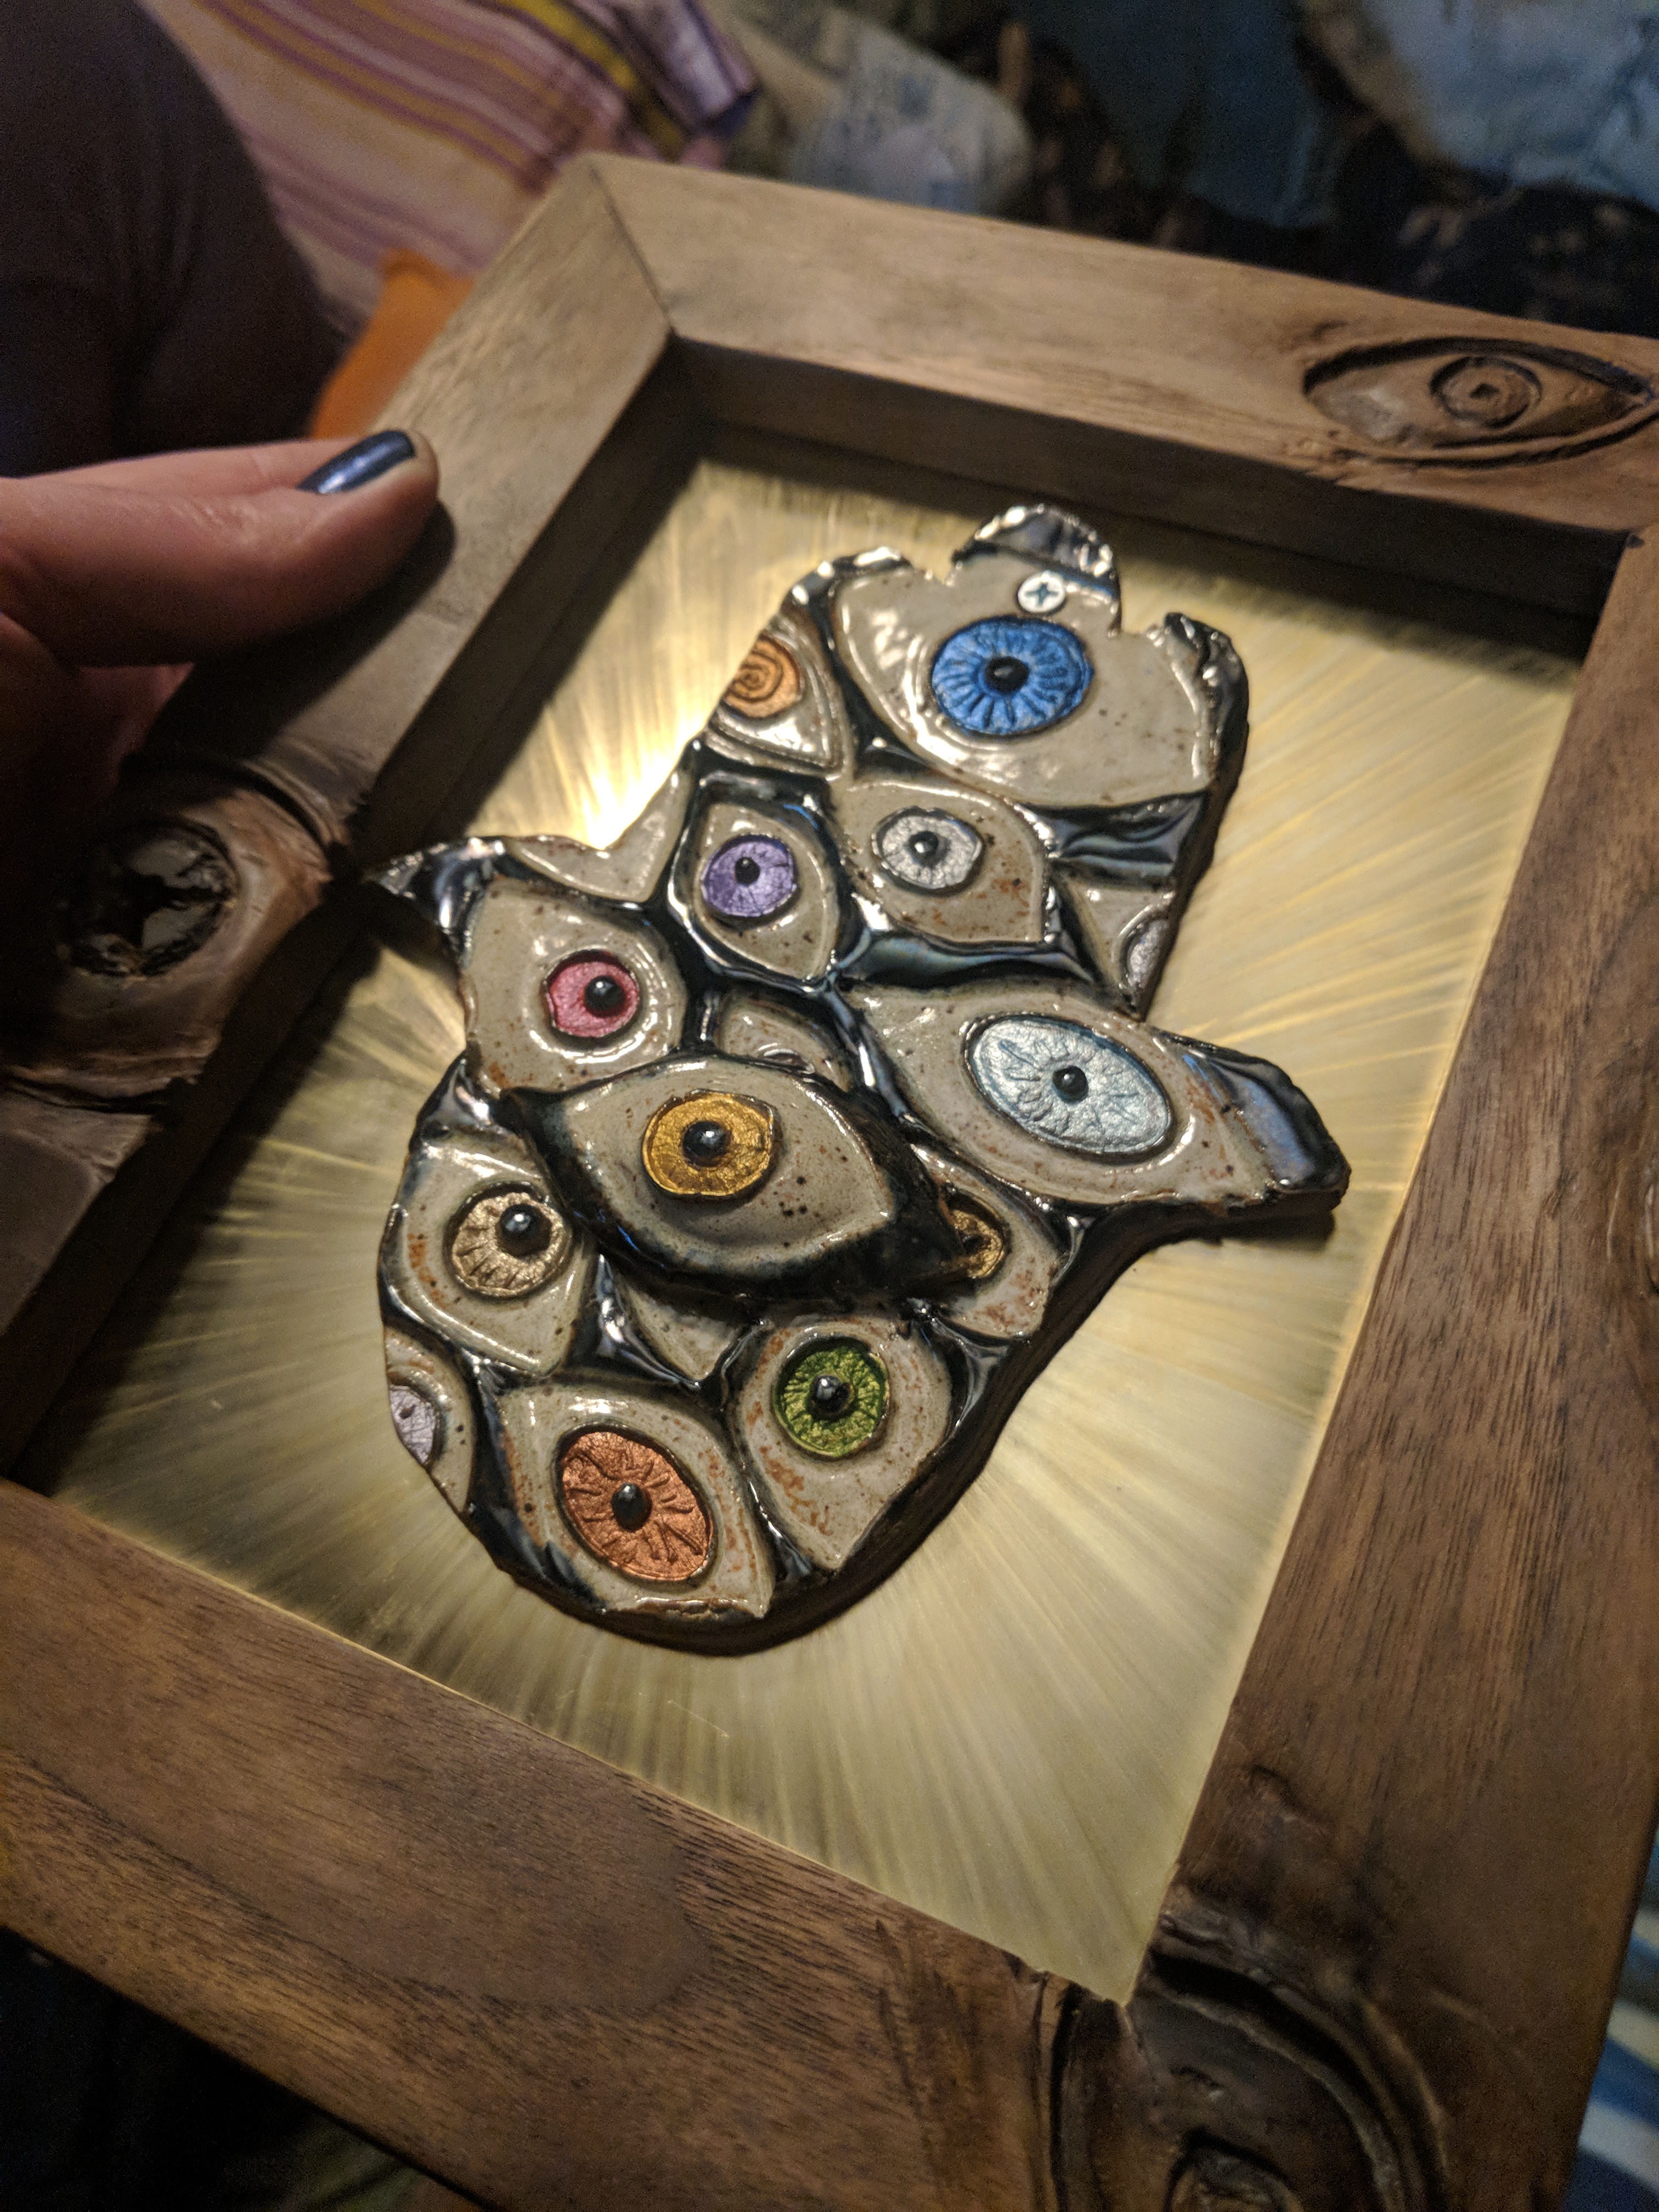
Some months ago piece of artwork arrived from Aberrant Ceramics for my housemate. It's a beautiful piece; in the shape of a hamsa, a field of unblinking eyes looks out from many iris colors against a background of glossy black. At the center of the palm is another eye, raised from the others and staring directly outward. My housemate has a thing for eyes...
When it arrived we weren't sure where to place it. While it did have a single mounting hole, it seemed too special to not give it some additional protection. Instead, it ended up on my desk. Since I telecommute for my day job, I had a lot of opportunity between Slack and SSH what to do with it. I had some distinctively knotty walnut left over from an aborted project, and it occurred to me that those knots look a lot like eyes. I liked the idea, but it didn't seem complete.
Around the same time, we also had visited The Museum of Russian Art in Minneapolis. Their collection of icons in wood, tempura, and gold leaf were awe inspiring. When I got back to my desk it struck me: While I didn't have any gold leaf, a backing of brass from the local hardware store would definitely tie things together.


While I had made several picture frames before, I wanted to try something different this time. I have been developing a love of working with hand tools only. The quieter, slower, and more physical process of building something with only muscle power has a lot of meditative appeal for me.
Using the Magnetic Saw Guide I had built earlier, I used a dozuki saw to cut the walnut into mitered pieces. Before this, I used a power chop saw to make the cuts quickly. Being my chop saw was second hand and rather beat up, it never seemed to cut at a consistent angle. I was hoping that by doing this by hand, I wouldn't have that problem.
On the contrary, it made the problem worse.
I'm still not used to Japanese saws. My dozuki in particular is very thin and tends to flex in ways I'm not accustomed to. The result was a cut that was....less than ideal even with the help of the saw guide. I felt I had kind of ruined the project at that point, but instead put it down for more thinking and research.
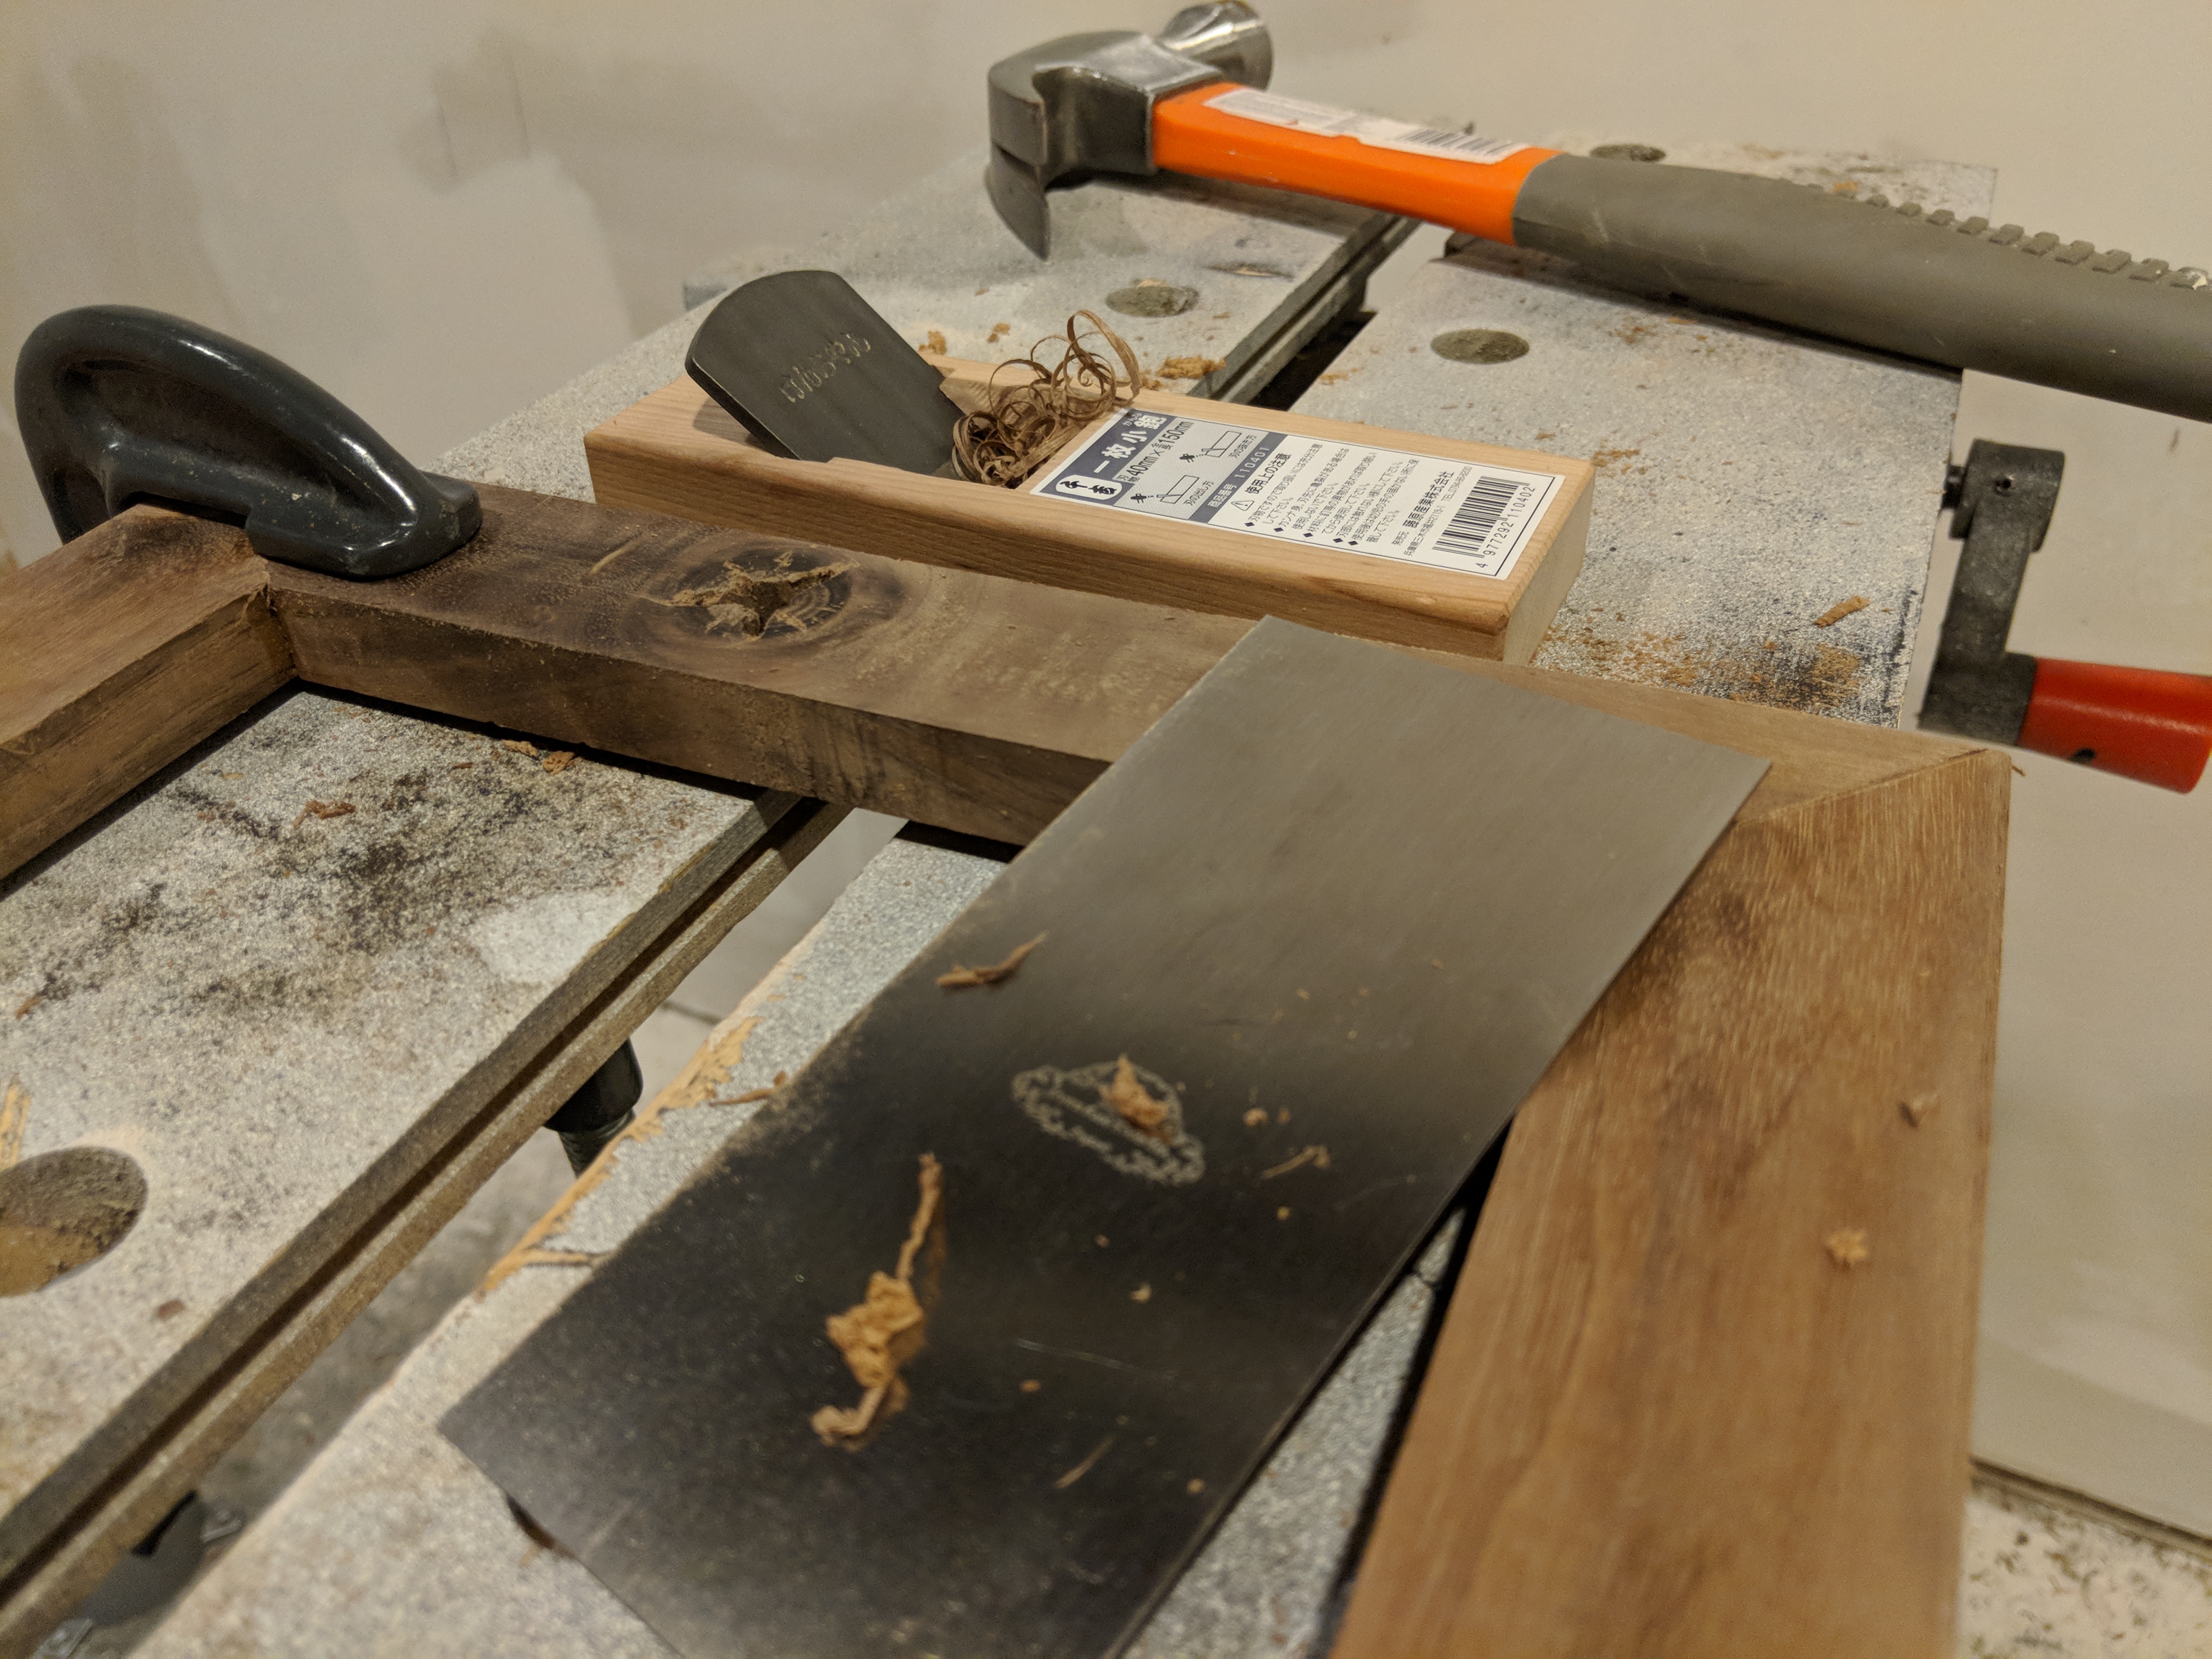
Inaccuracy is the bane of both hand tool users and picture frame makers alike. Fortunately, there's also a clever solution called a shooting board. No, it has nothing to do with firearms, but instead is a kind of jig used to flatten ("true up") a saw cut. Normally, it's very hard to flatten a cut edge of a piece of wood. There may not be enough surface area to act as a reference point needed for the plane to rest consistently. That's where the shooting board comes in, by adding that needed reference.
Shooting boards have a two important parts, a planing stop and a channel for a hand plane to slide along. The idea is you put the piece of wood to true against the stop, then run the plane along that cut in the channel, shaving off tiny pieces. This flattens the cut and sets the angle more precisely. It's a little hard to explain, but Paul Sellars has an excellent video about shooting boards.
The shooting board's planing stop determines the angle by which the shavings are made. As plane, the flattened pieces take on a shiny appearance. That's how you know your edges have been flattened.


The shooting board makes a huge difference. Instead of relying entirely on the accuracy of the cut, you can use the shooting board to tweak and flatten the parts of the joint until you close all the gaps.
It astonished me how a simple tool like a shooting board can drastically improve the viability of hand-tool only work. It makes things much easier to correct, but I never heard of it before until now. I've certainly never seen anything like it in hardware store.


A critical part of a picture frame is the inset -- an L shaped channel around the inside edge against which the art and backing rests. For past picture frame projects, I used a router table to mill the channel. While this certainly gets the job done quickly, it shares many of the same problems as my chop saw. It's a loud, noisy power tool that doesn't quite cut as easily as I'd prefer.
I had hoped that I could use more basic hand tools to cut the L-channel, or "rabbet" (or "rebate" in the UK). I tried using my dozuki and some chisels, but the result was deplorable. I couldn't get an accurate cut once more, and the chiseling resulted in a rough and torn appearance.
What I really needed was yet another tool I didn't yet own, a router plane. A router plane is a bit of a relic today. Like a hand plane, it provides a flat surface that runs along the wood to create a reference point for a blade. Unlike a normal hand plane, the router plane blade is much smaller than the plane body. The blade drops below the sole of the plane, creating a parallel cutting edge for channels or mortises.
After a lot of planing, I created a shallow channel all around the inside perimeter of the frame. I didn't need it to be deep, as the backing was going to be a sheet of brass.
Once I had the edges true and the channel cut, I could finally glue it all together. I had been working on this project for almost a month at this point. Some weekends I simply didn't have it in me to work on it, but often I just didn't want to rush it.
The knots posed some problems at this point in the construction, since they both made the wood difficult to work, as well as brittle. At one point, a small piece broke off on one of the mitered edges, requiring a careful fix after assembly.

Once the glue was dry and all the pieces were back together, I needed to smooth and flatten the frame. Normally, I would use a power sander for this, but I also wanted to try something different.
Another relic of a tool I learned about was a card scraper. Card scrapers are just flat pieces of hard steel cut in particular shapes. They are used to scrape the surface of the wood. Since this was a picture frame, I used my rectangular card scraper. Card scrapers need to have their edges burnished slightly to create a cutting surface. Once this is done, the scraper acts a lot like fine hand plane in smoothing surfaces.

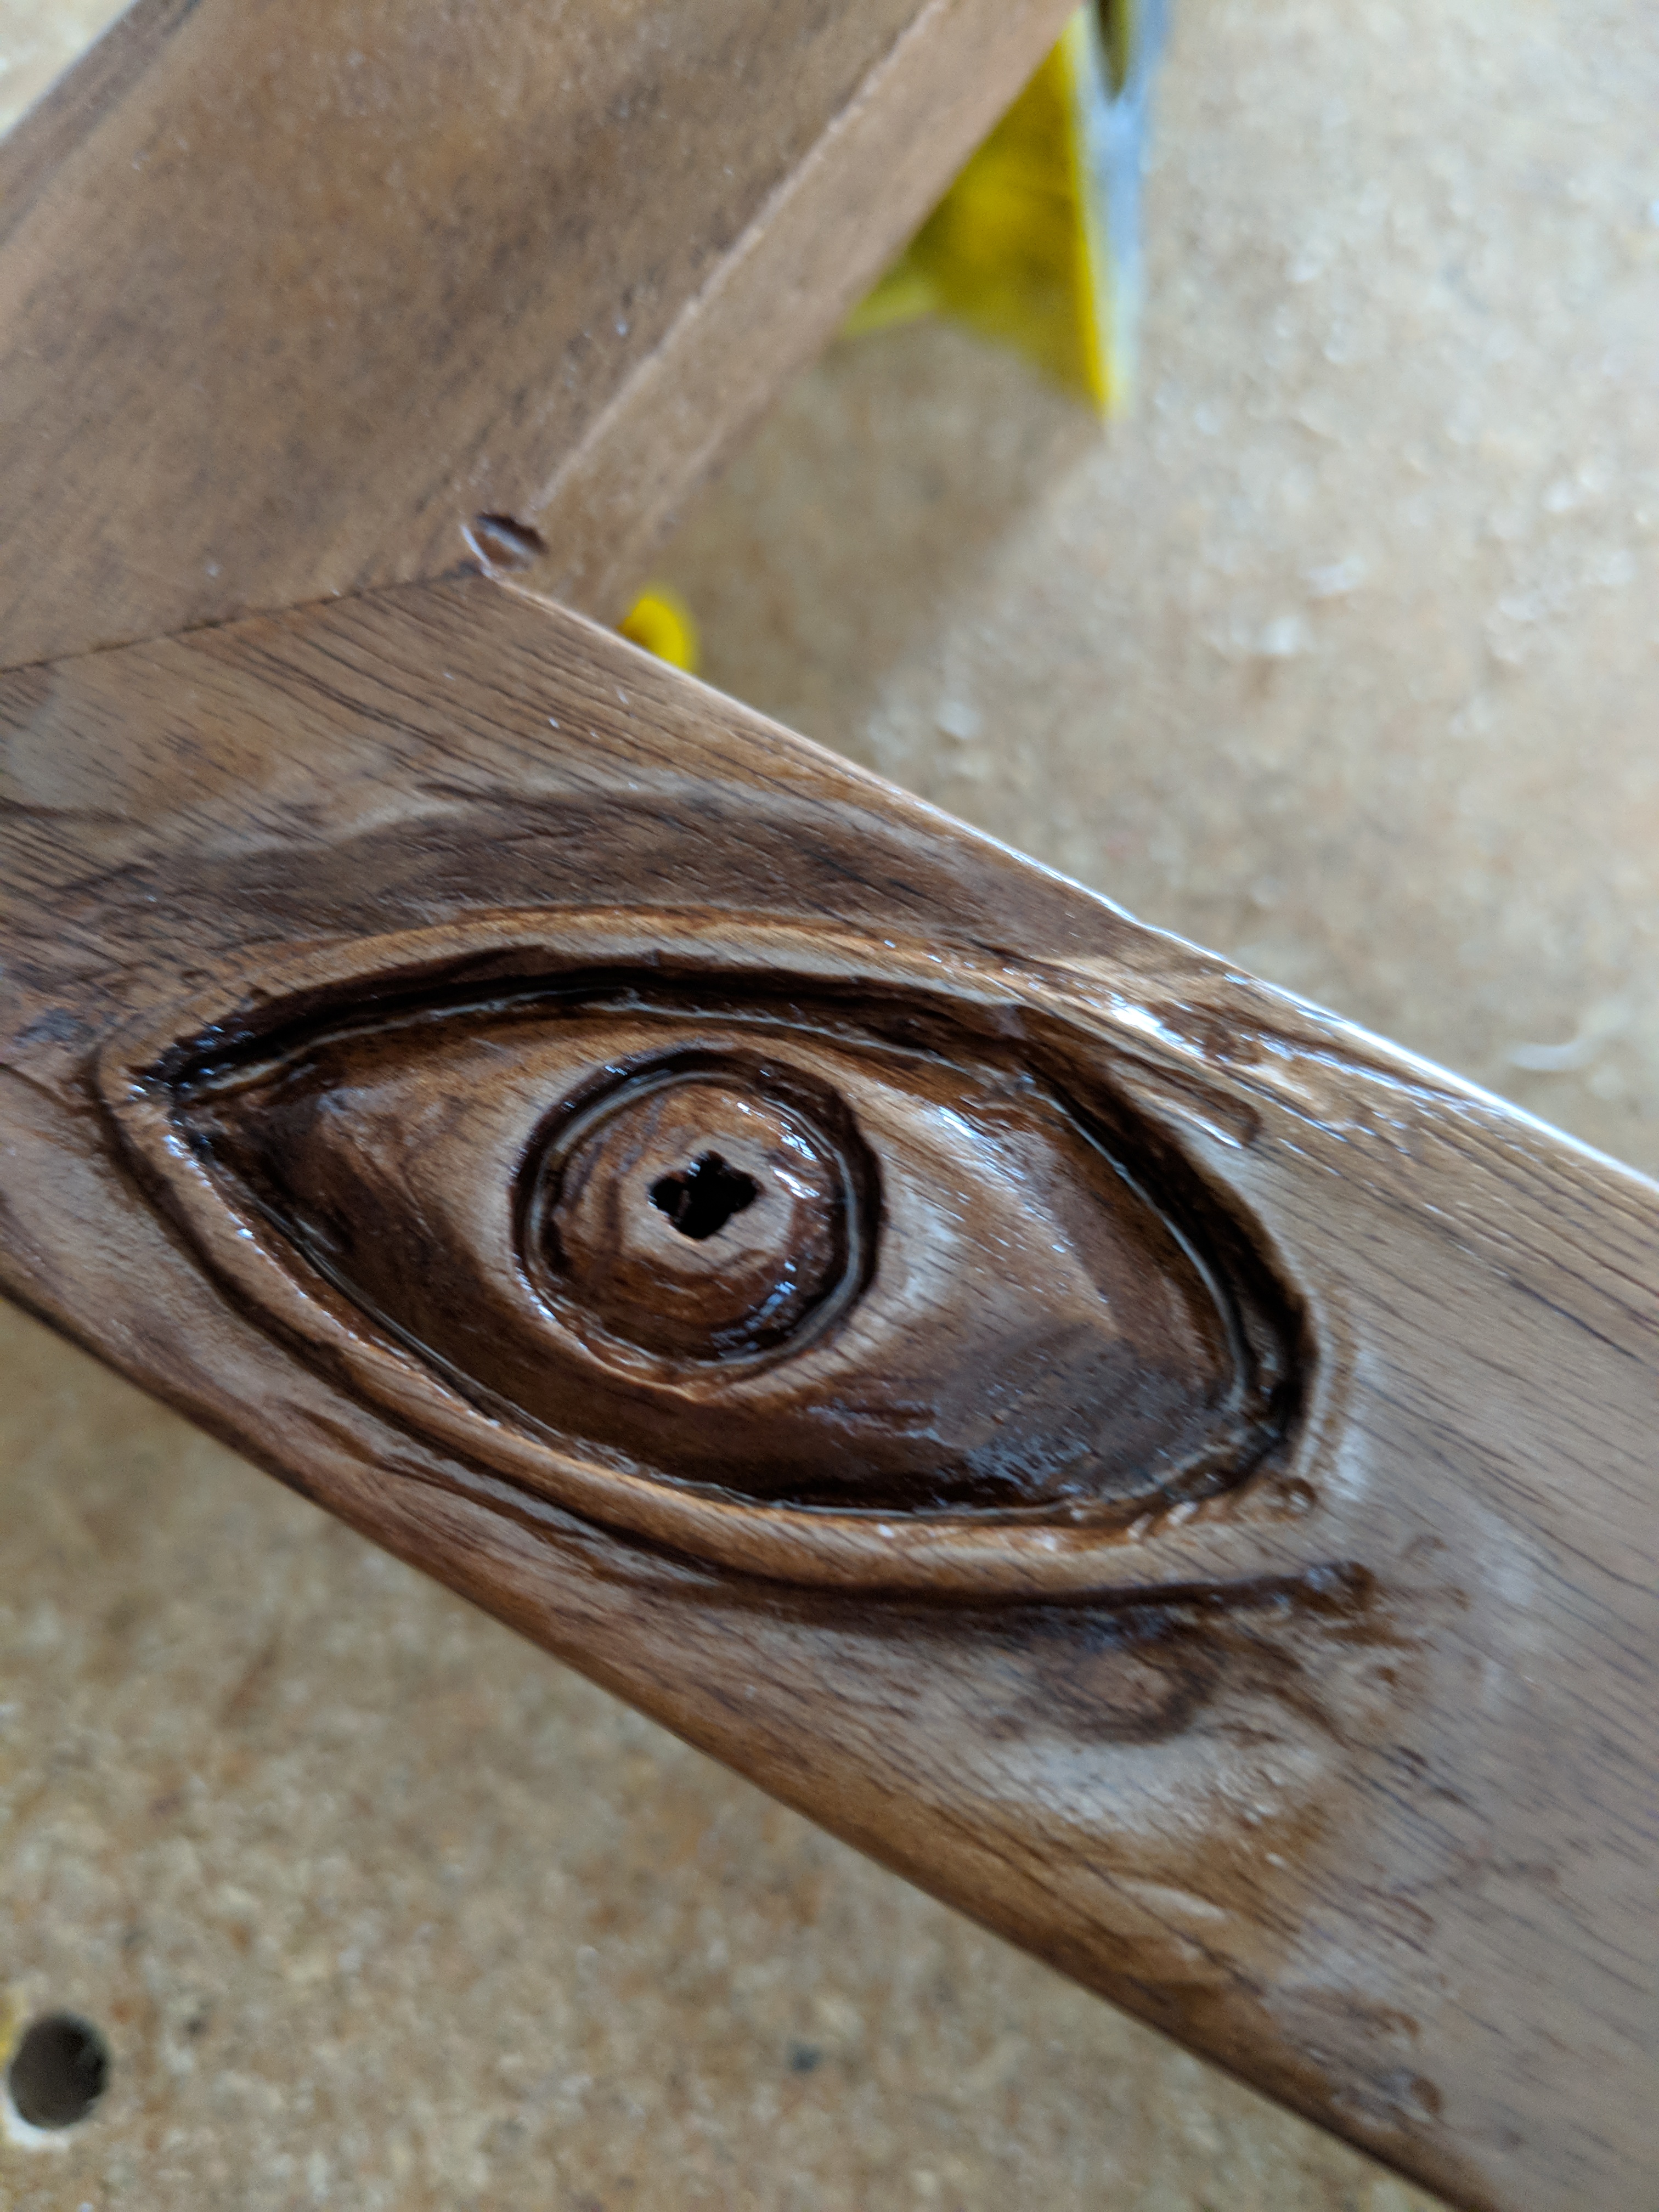
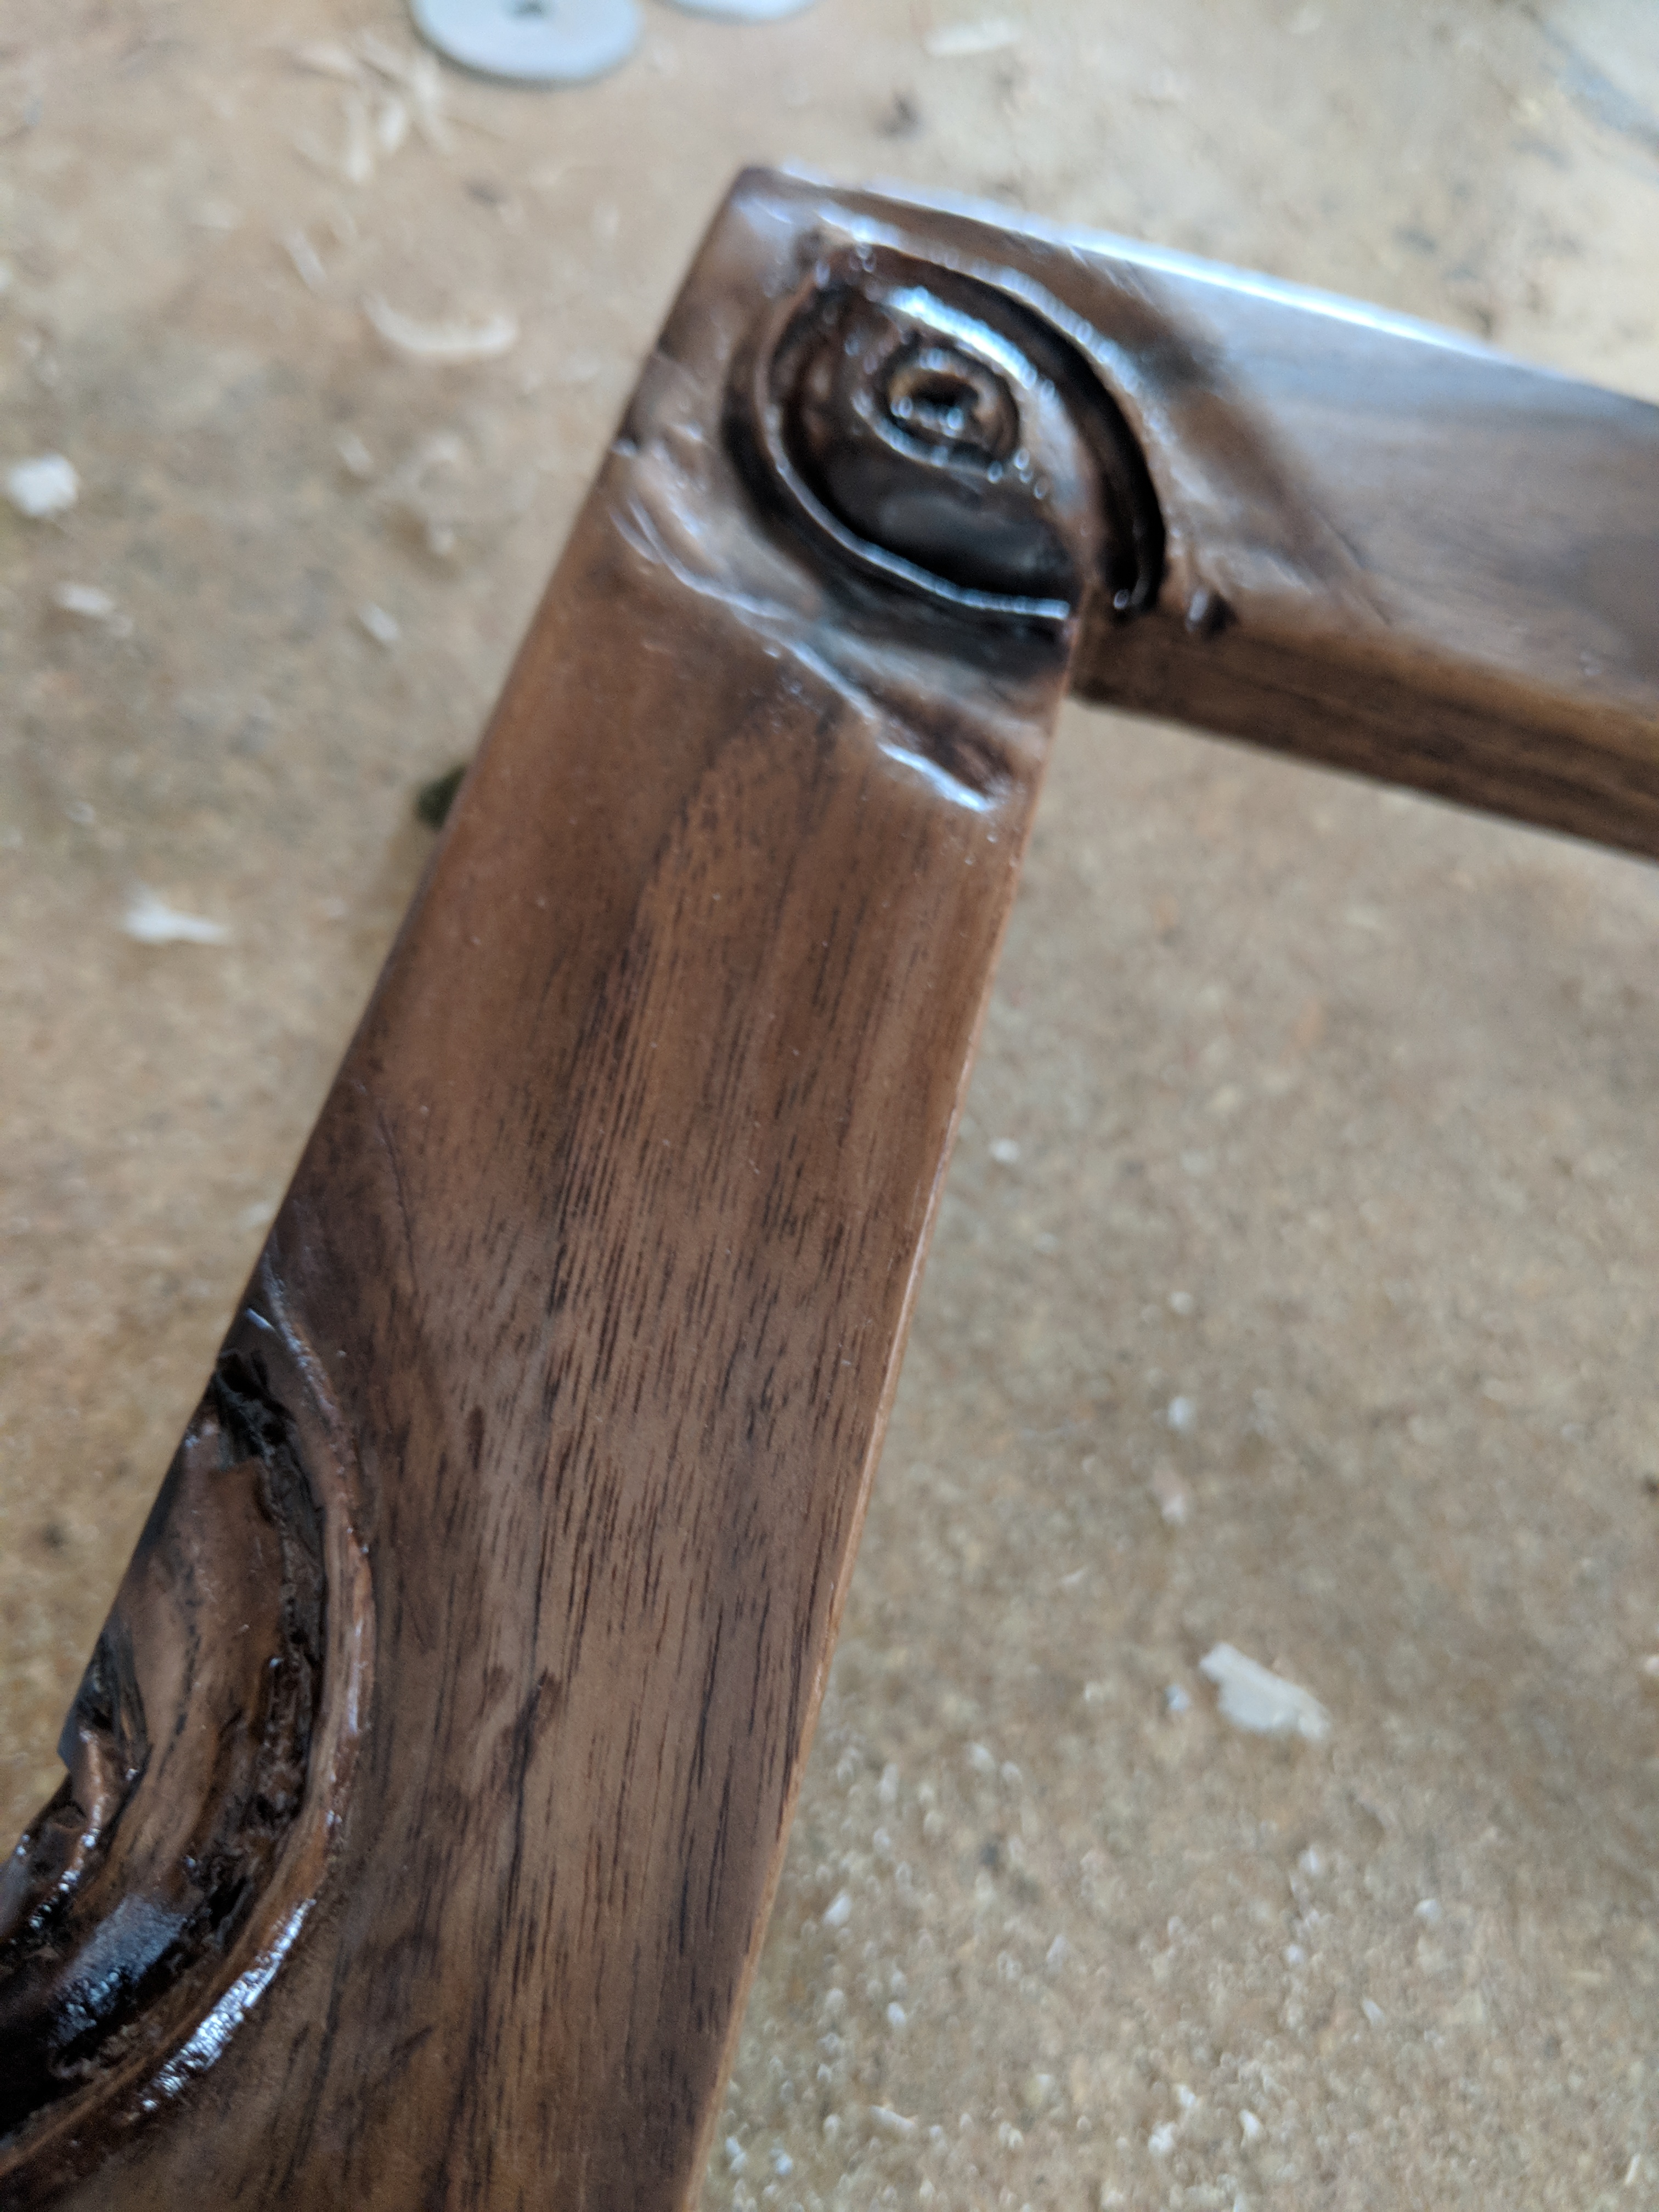
Originally, I had thought I would take advantage of the knots in the wood to create the impression of eyes. At this point in the project though, I felt that needed to be much more overt.
Now in the third month of this project, I picked up yet another tool. I had considered using hand tools such as carving knives to do this part, but I wasn't sure if my RSI would fair so well. Instead, I got a pencil attachment for my Dremel tool, as well as several carving bits. I never used a Dremel to carve anything like this before, and I was concerned I'd destroy the frame completely. After several hours of work however, I managed to make the four knots in the frame into something rather eye-like.
Feeling confident, I decided to carve one more eye into the top of the frame where there were no knots. I couldn't make it as deep, as a keyhole slot had been cut in the back of the frame as a mounting point. Nevertheless, I was still proud of the result.
After cutting the brass backing to size, I used a wire wheel to create a halo affect centered at the eye on the palm of the hamsa.


Finishing this piece had several challenges, the first of which being it's still winter where I live. I waited for a particularly warm day before brushing on three coats of Danish Oil. It took some effort to work the oil into the knots and contours of the eyes.
It's at this point the frame really came alive. The almost grayish walnut took on rich brown, with the grain around the carved eyes. Danish oil alone isn't a bad finish for a picture frame, but I wanted a finish that was a bit more glossy.
So, I decided to try something new, paste wax. Paste wax is a combination of waxes with a solvent to make it pasty. As the solvent dries, the wax is left behind. Once buffed, the result is a shiny and hard finish.

Finally, I had all the pieces finished and I needed to put it all together. Sadly, I discovered yet another problem.
For many of my other frames, I used small nails (brads) to hold the backing in place to the frame. Usually some careful hammering is all that was necessary, but the shallow nature of the rabbet made this difficult. If I applied too much pressure, I'd dent the brass backing and it would show through. After doing some more research, I found a tool called a brad pusher that seemed a perfect way to get the nails in precisely. After a little careful drilling, I managed to secure the backing using the brad pusher alone.
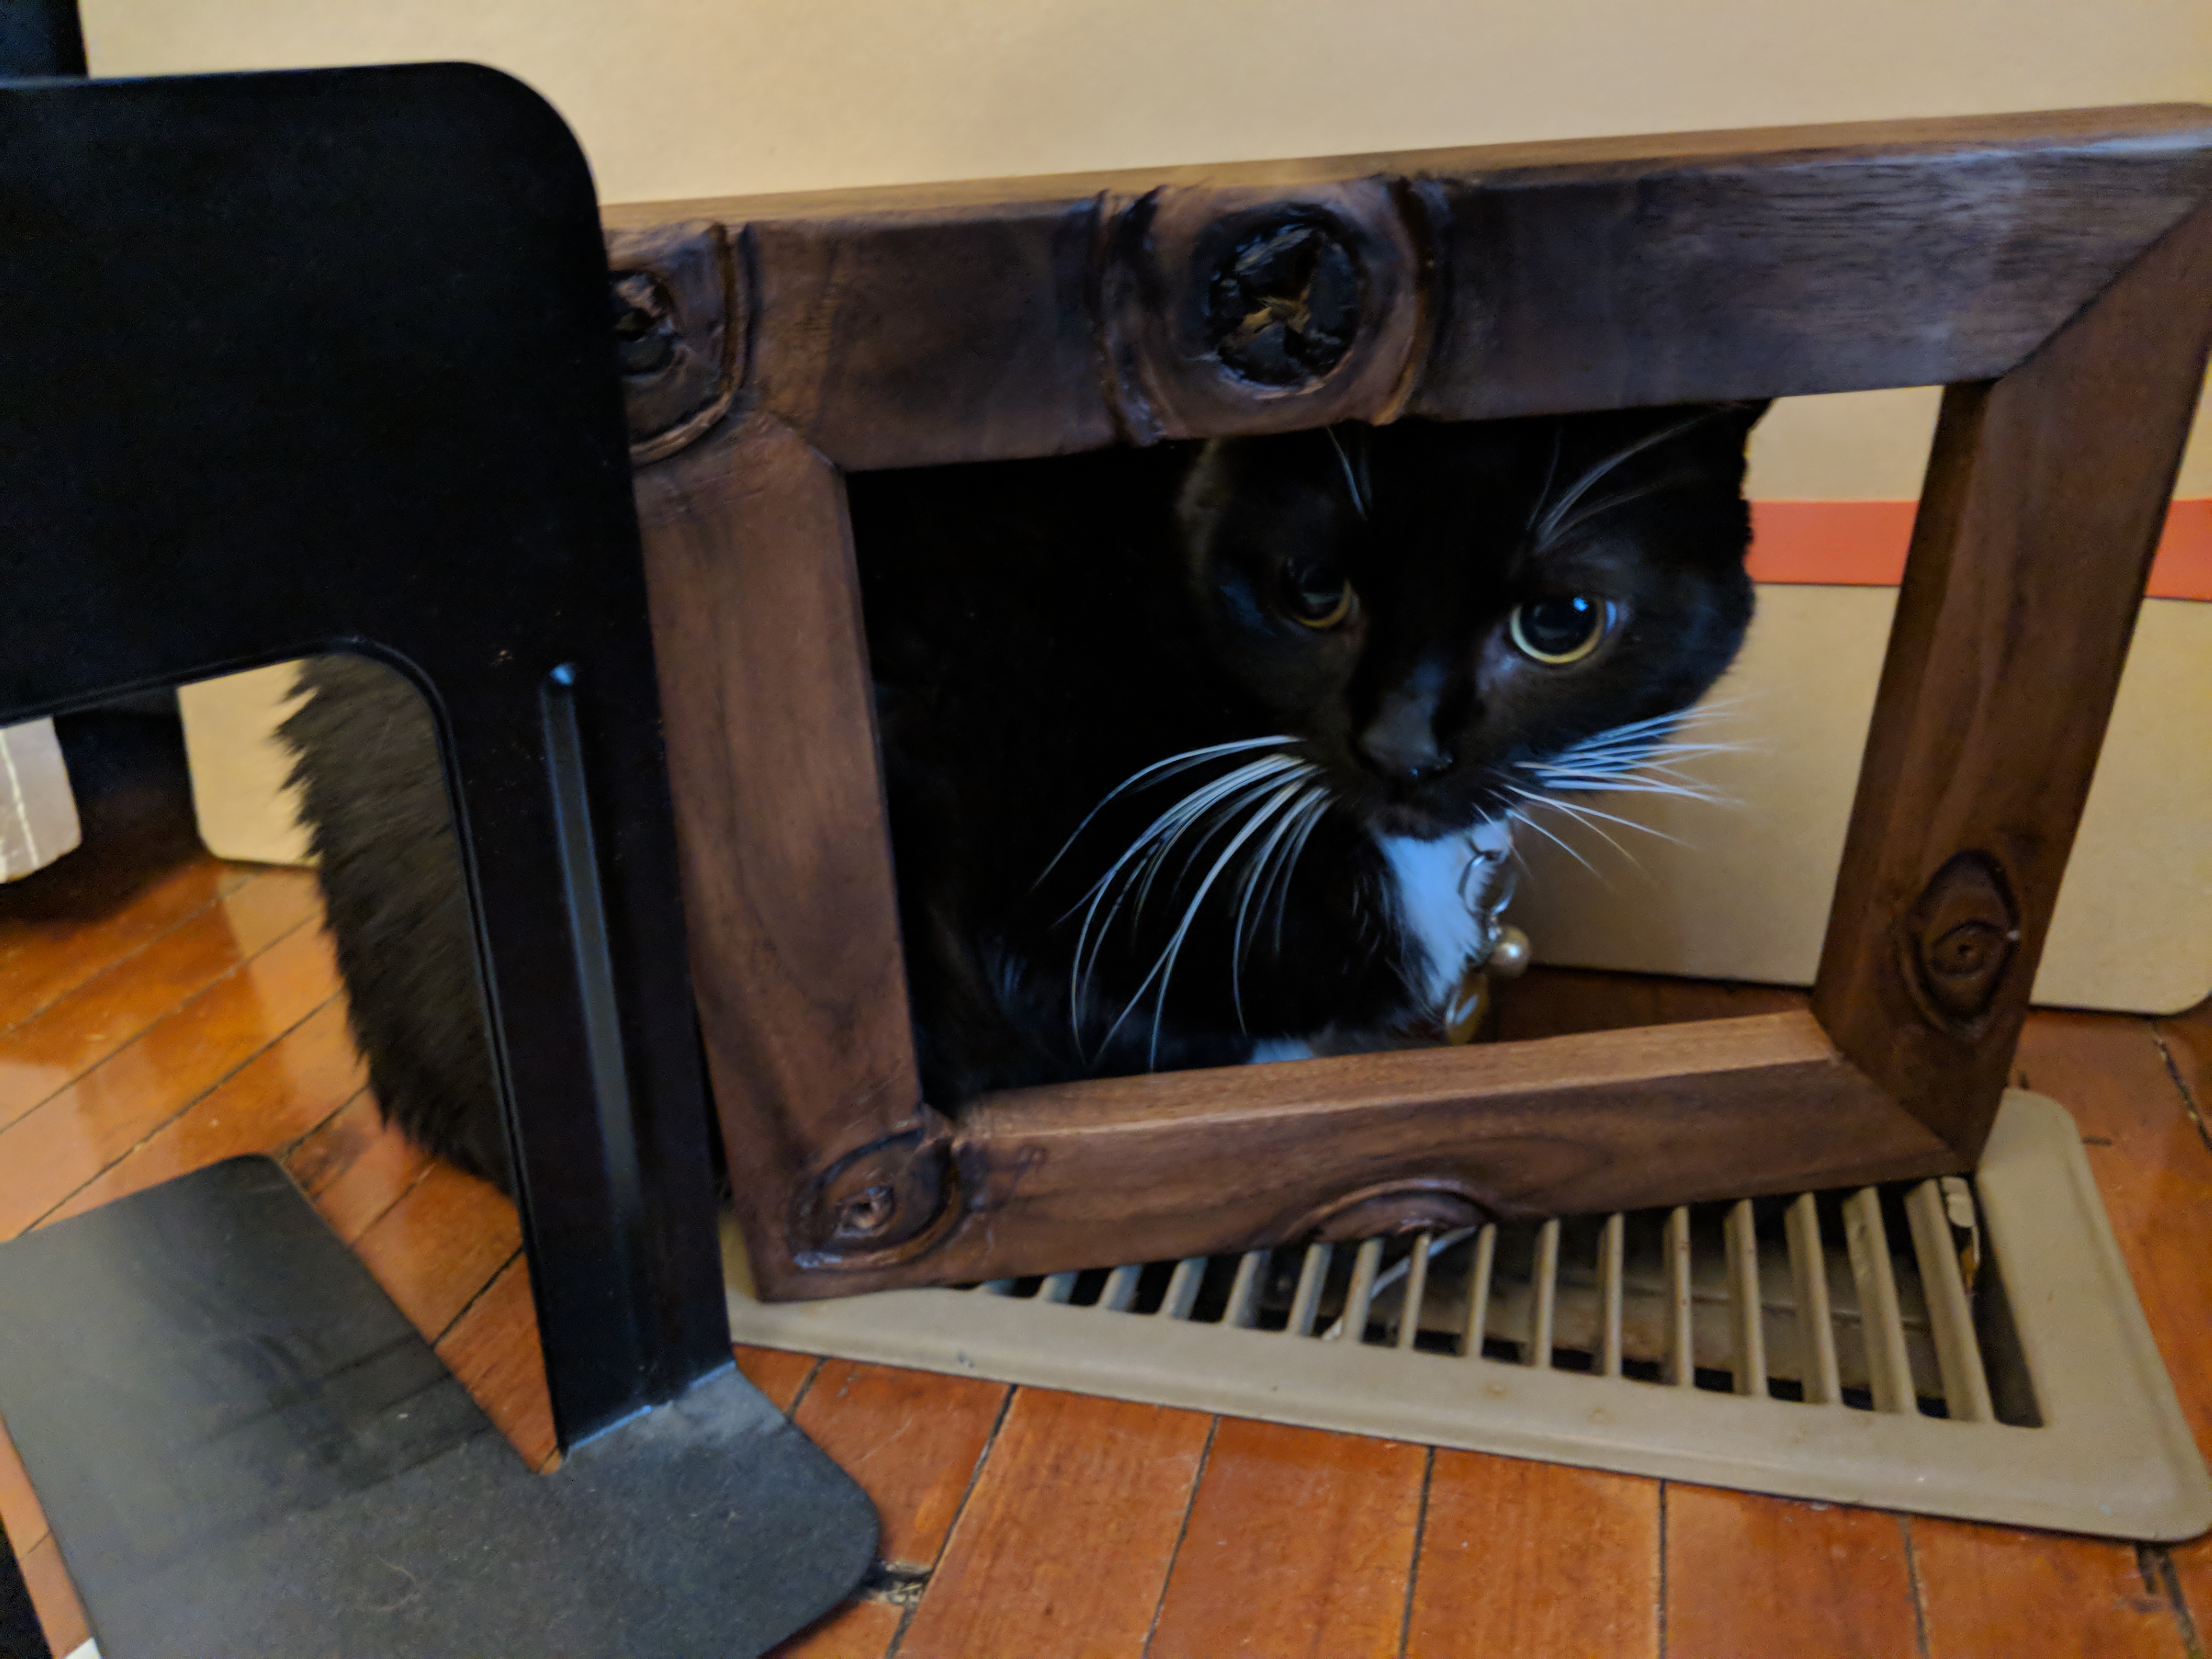
The last problem was mounting the hamsa itself. I decided to use foam tape and a single bolt to secure it to the backing. No, it wouldn't withstand a tank, but it would keep everything in place easily. Even if the tape failed, the bolt would prevent the ceramic from falling onto the floor.
The project took forever, but I was ultimately very happy with the slower pace. It allowed me to think carefully about each problem without succumbing to hasty solutions. The result is gorgeous, and I've never even done wood carving before!
I bought a lot of additional tools to help with this project, a router plane, card scrapers, the brad pusher, as well as some manual hand drills I had yet to mention. It wasn't that these tools were only useful for this project, but I did see the need for them, and combined with the slower pace of this project the expense wasn't painful.


